Appearance
Exporting Meshes
Once your mesh is generated and verified, the final step is to export it so that it can be used for simulation in FEniCS or other solvers.
This is the simplest part of the entire pre-processing workflow.
Exporting the Mesh
- In the Object Browser, right-click on the mesh you created.
- From the context menu, select Export → MED file.
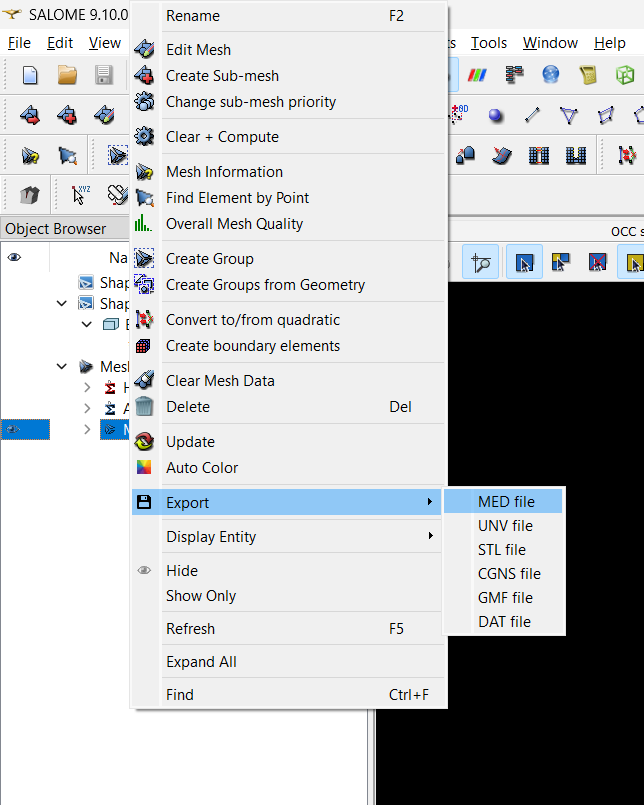
In the dialog box that opens:
- Choose the location where you want to save the mesh file.
- Enter a file name, for example
cantilever_beam.med. - Click Save.

Salome will export the mesh in .med format — the standard file format supported by FEniCS and many other open-source solvers.
Verifying the Export
Once exported, you can find your file in the selected directory. You can later open this .med file again in Salome or convert it to .xdmf or .xml using meshio in Python if needed for your FEniCS simulations.
Summary
That’s it — you’ve successfully exported your mesh!
This simple step completes the pre-processing workflow in Salome:
- You created the geometry.
- Defined physical groups.
- Generated and refined the mesh.
- And now, exported it for use in simulation.
In the next section, we’ll explore Salome scripting, where you’ll learn how to automate geometry and mesh creation using Python scripts, and how to edit and customize your workflow programmatically.