Appearance
Branch, Commit, Push, Pull
Now that your GitHub Desktop is set up and connected to your repositories, it’s time to understand how version control actually works. These four core actions — Branch, Commit, Push, and Pull — define how we manage changes and collaborate efficiently on projects.
This page explains what each action does and how to perform it using the GitHub Desktop interface.
Branch – Working on a Separate Line of Development
A branch lets you work on new features, experiments, or fixes without affecting the main project. Think of it as creating a copy of your project’s current state where you can make changes safely.
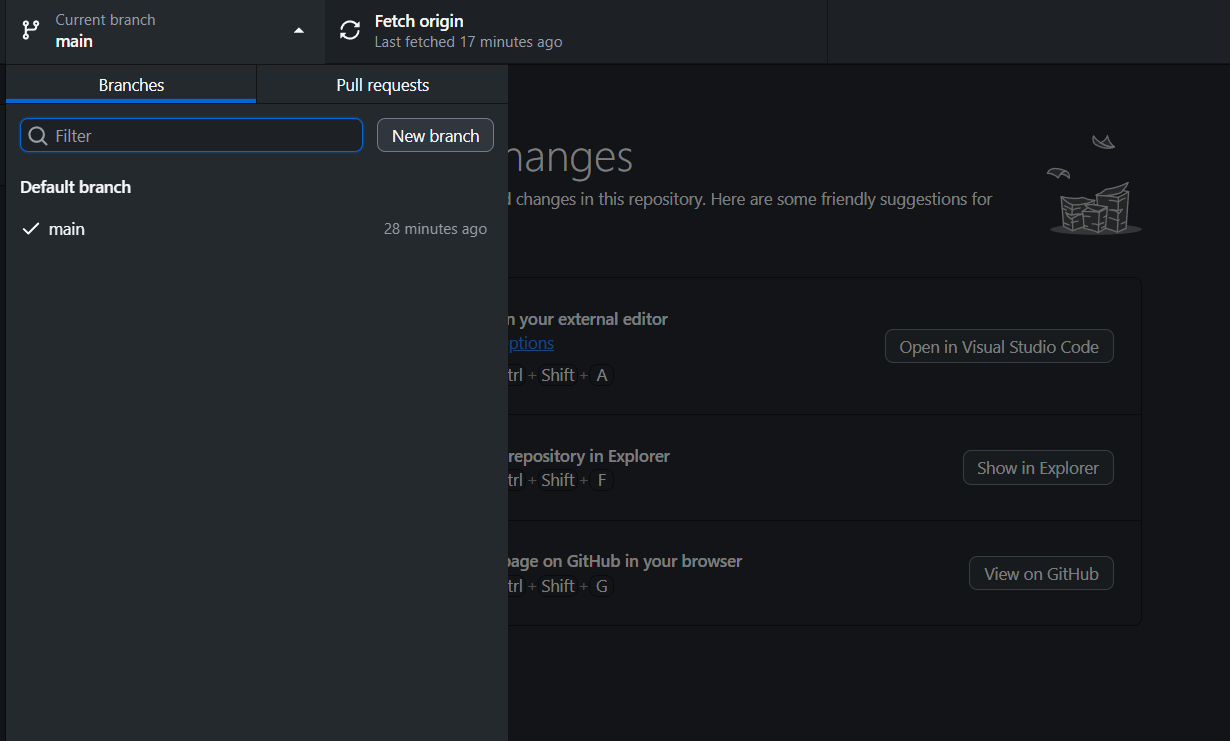
Creating a branch in GitHub Desktop:
Open your repository in GitHub Desktop.
On the top bar, click the Current Branch dropdown.
Select New Branch....
Give your branch a meaningful name, for example:
feature-fenics-setup-updateClick Create Branch.
You’re now working on your new branch. Any changes you make will stay isolated until you decide to merge them later.
Commit – Saving a Snapshot of Your Work
A commit is a saved snapshot of your project at a specific moment in time. It helps you keep track of what changed, when, and why.
Making a commit in GitHub Desktop – step by step:
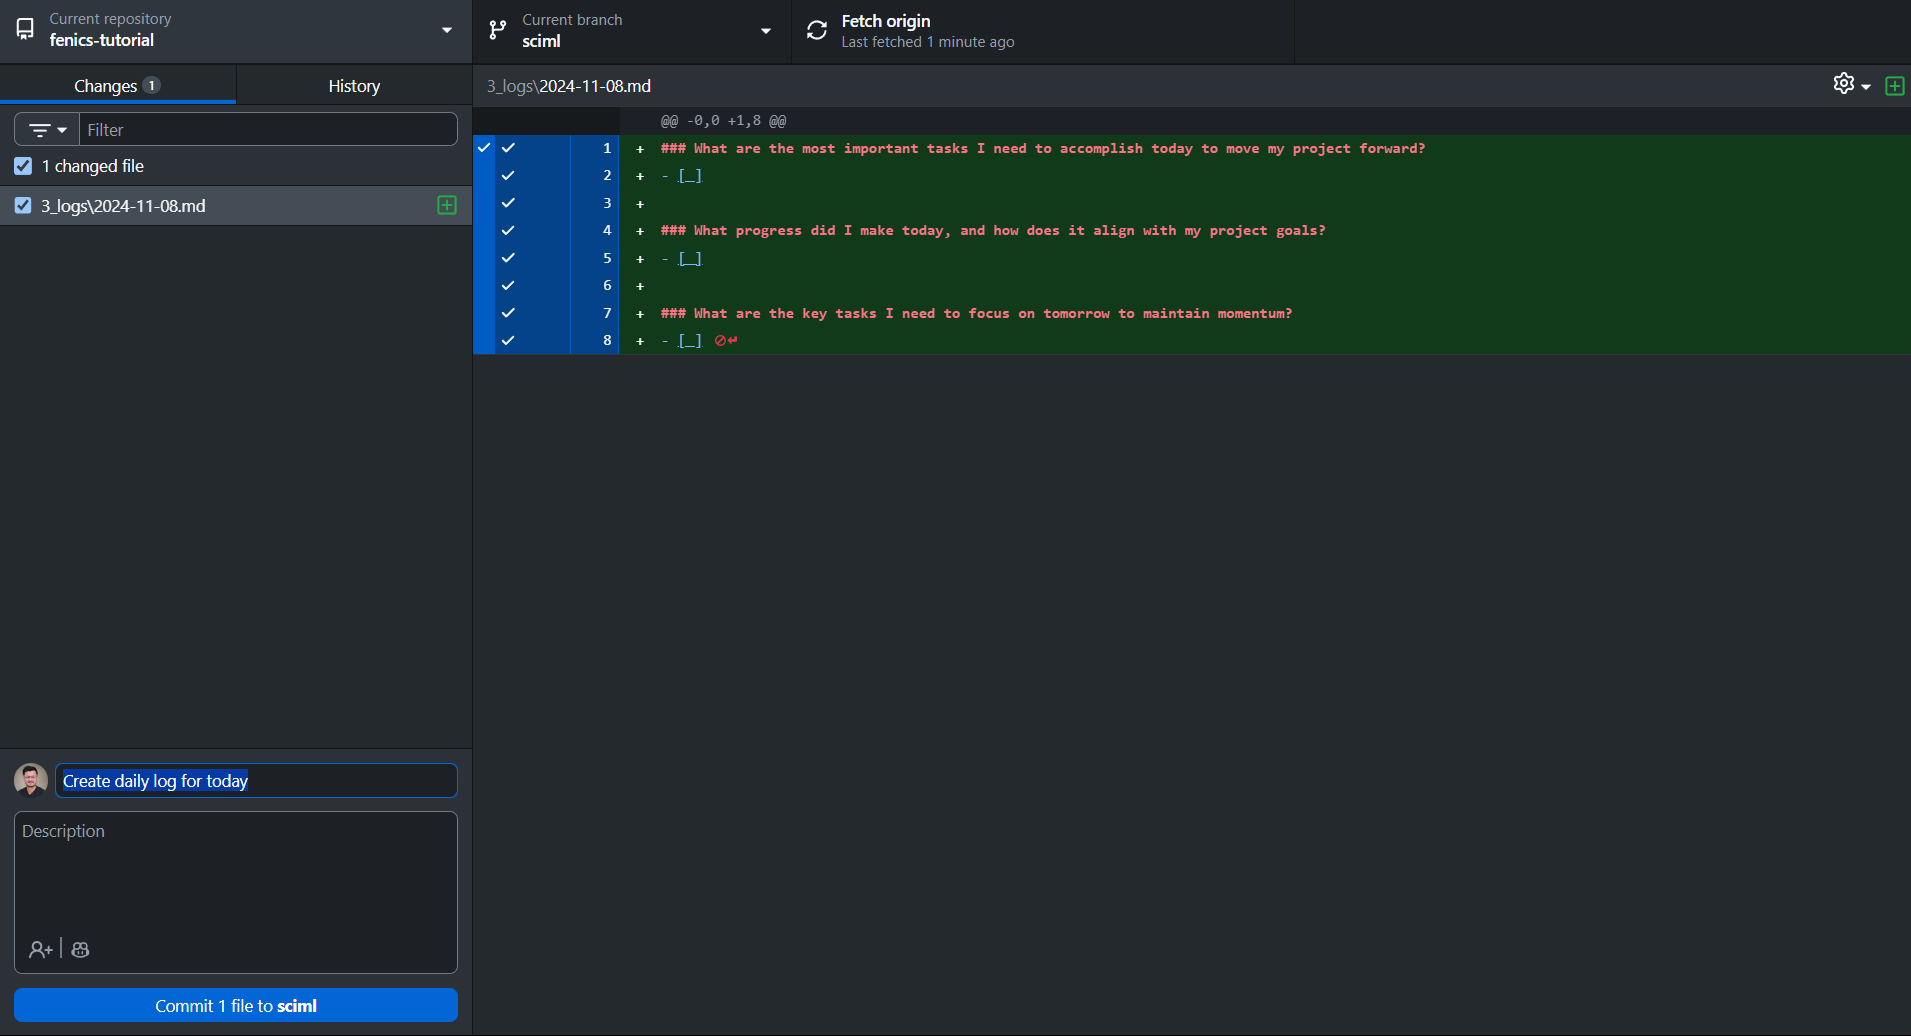
After editing files in your repository (for example, updating a Markdown document or Python script), open GitHub Desktop.
Switch to the Changes tab on the left — you’ll see all modified files listed.
Review the changes by clicking each file to see what lines were added or removed.
Write a short, descriptive commit message in the text box at the bottom — for example:
Create daily log for todayClick Commit to main (or to your current branch).
This records your changes locally but doesn’t yet upload them to GitHub.
Tip: Keep your commit messages clear and action-oriented. Examples: “updated mesh conversion script” or “revised VS Code setup steps.”
Push – Uploading Your Work to GitHub
After committing locally, you’ll need to push your changes to GitHub so others can see them.
Pushing in GitHub Desktop:
- Once your commit is complete, you’ll see a Push origin button at the top.
- Click it to upload your commits to the online GitHub repository.
- Wait until GitHub Desktop shows “Everything up to date” in the status bar.
Now your latest changes are visible to everyone on the team.
Note: Always make sure your work is properly tested or reviewed before pushing to shared branches like
mainormaster.
Pull – Bringing in the Latest Updates
When working in a team, others might make changes to the same repository. To stay updated, you’ll need to pull their latest commits before continuing your work.
Pulling in GitHub Desktop – step by step:
- Click Fetch origin to check if any updates exist.
- If changes are available, you’ll see a Pull origin button appear.
- Click it to download and apply the new commits to your local copy.
- Once done, your repository will show “Up to date with origin/main.”
Golden Rule: Always fetch or pull before pushing your own commits. This keeps your repository synchronized and prevents merge conflicts.
Putting It All Together
Here’s how these actions connect in a typical workflow at Avkalan Labs:
- Fetch origin to ensure you have the latest code.
- Create a new branch for your specific change.
- Make edits and commit your changes with a clear message.
- Push your branch to GitHub.
- Later, open a pull request to merge your work into the main branch.
This cycle ensures smooth collaboration, traceability, and conflict-free updates across multiple contributors.
Summary
You’ve now learned how to manage changes visually using GitHub Desktop:
- Create branches for isolated work
- Commit changes to record progress
- Push commits to share updates
- Pull the latest work from collaborators
In the next page, we’ll cover Pull Requests — how to review, merge, and collaborate effectively within shared repositories.