Appearance
Setting Up Python in VS Code
Once VS Code is installed, the next step is setting up Python — the core language used for simulations, automation, and scientific computing at Avkalan Labs. VS Code provides excellent Python support through extensions and built-in integrations for environments, Jupyter notebooks, and debugging.
Let’s go through the setup process step-by-step.
Install the Python Extension
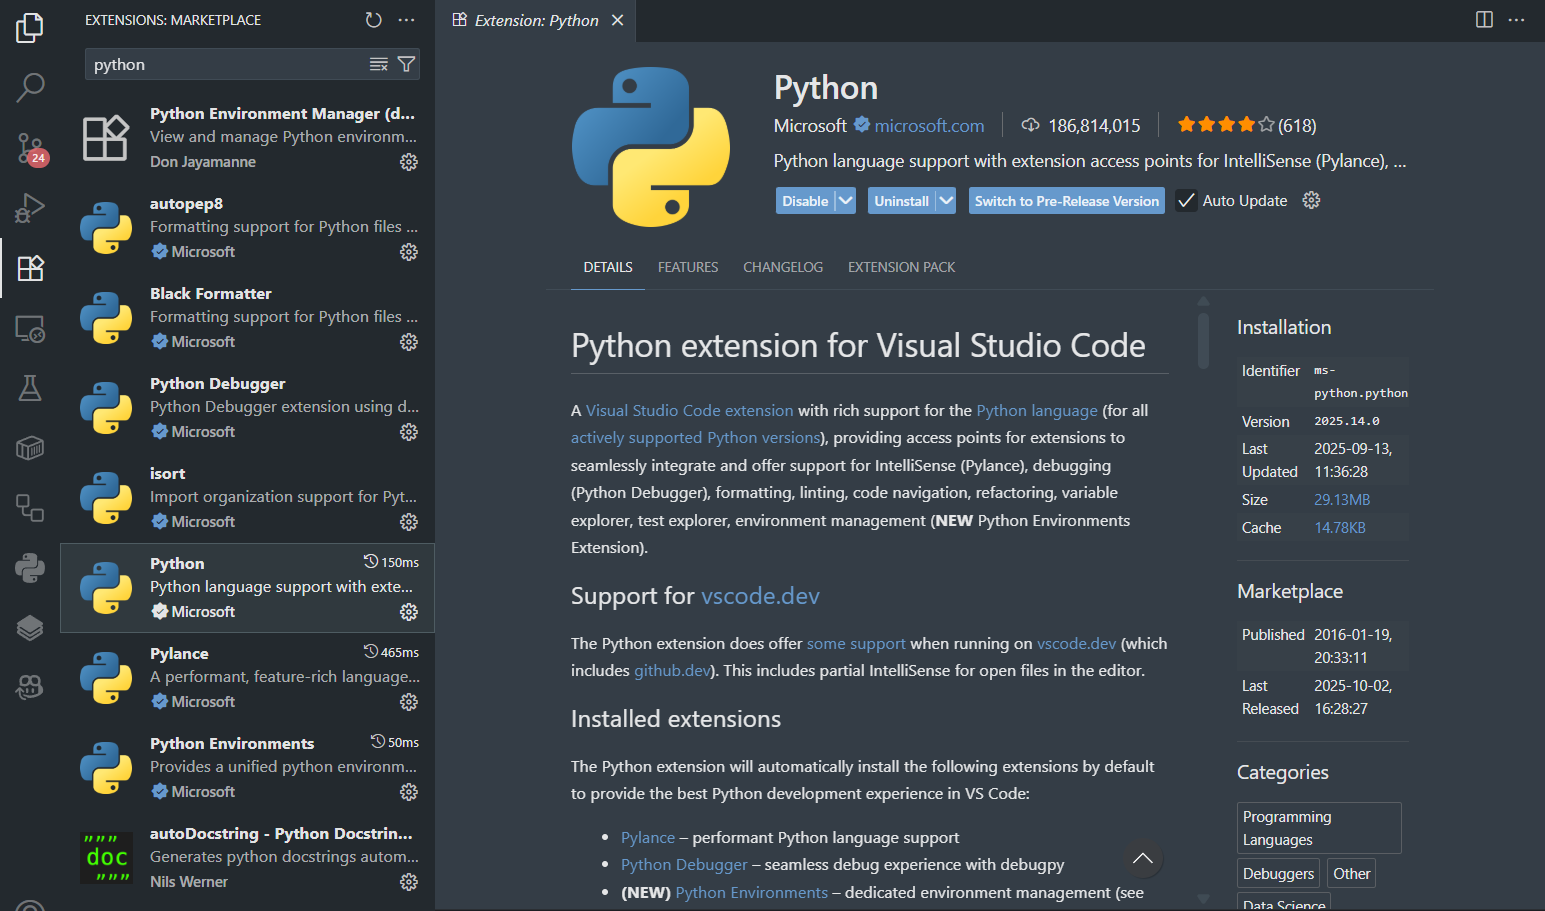
First, install the official Python extension by Microsoft.
- Open VS Code.
- Click on the Extensions icon (📦) on the left sidebar.
- Search for “Python” by Microsoft (
ms-python.python). - Click Install.
This extension adds everything you need — syntax highlighting, linting, debugging, and notebook support.
Verify Python Installation
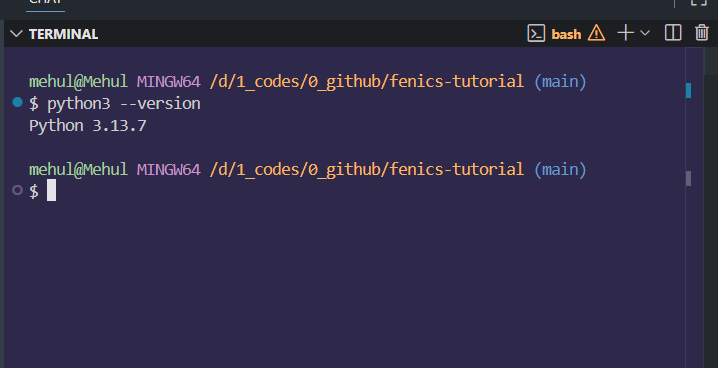
Before linking Python with VS Code, make sure it’s installed on your system. Open your terminal and run:
bash
python3 --versionor (on some Windows systems):
bash
python --versionIf you see a version number like Python 3.10.12, you’re good to go.
If Python is not installed, download and install it from the official site: 👉 https://www.python.org/downloads
During installation (on Windows), make sure to check the box: “Add Python to PATH”
Note:
If you encounter errors while running the above commands, ensure Python is installed on your system.
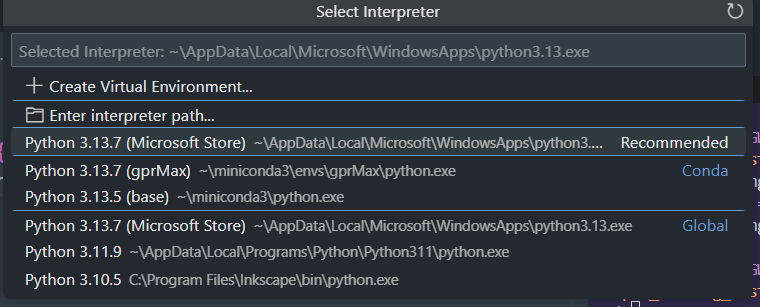
Selecting the Python Interpreter
Once Python is installed, VS Code needs to know which environment or interpreter to use.
To select it:
- Open the Command Palette (
Ctrl + Shift + PorCmd + Shift + Pon Mac). - Type and select “Python: Select Interpreter”.
- Choose the interpreter you want (for example,
Python 3.10.12 (WSL)or a virtual environment).
You’ll see the active interpreter displayed in the bottom-right corner of VS Code’s status bar.
Tip: If you’re using Docker or WSL, VS Code can automatically detect the Python interpreter inside those environments too.
Running a Python Script
Let’s test the setup with a simple script. Create a file called test.py and add:
python
print("Python setup successful in VS Code!")Save the file, then run it in one of the following ways:
- Option 1: Right-click in the editor → Run Python File in Terminal
- Option 2: Press
Ctrl + F5(orFn + F5on Mac) - Option 3: Open the terminal and type:
bash
python test.pyYou should see the output:
Python setup successful in VS Code!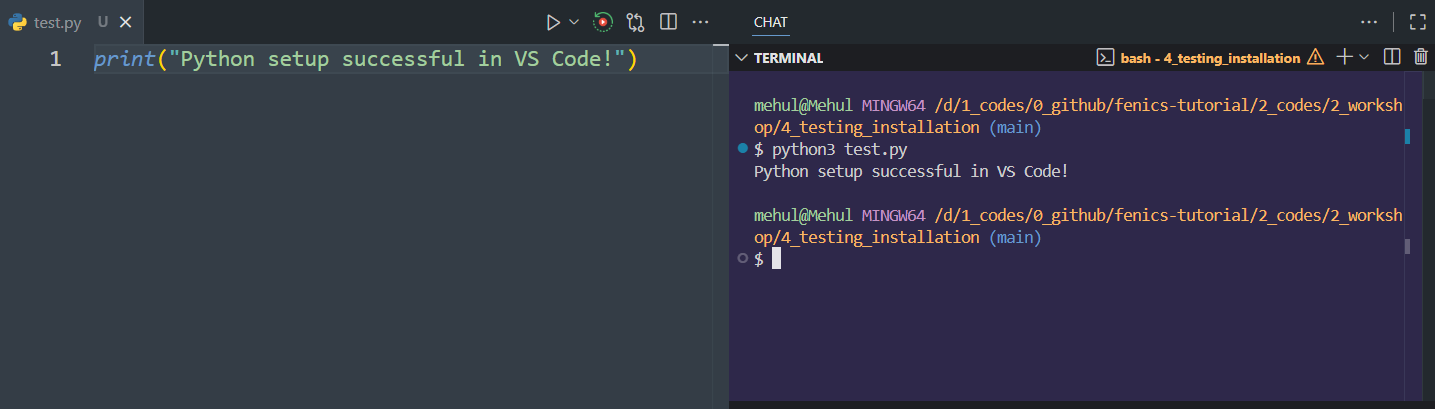
Setting Up Jupyter Support (Optional)
If you’ll be working with simulation notebooks, install the Jupyter extension:
- Open the Extensions view.
- Search for “Jupyter” (
ms-toolsai.jupyter). - Click Install.
Once installed, you can open .ipynb files directly inside VS Code — just like in a Jupyter Notebook environment.
Summary
You’ve now:
- Installed the Python extension in VS Code
- Verified your Python installation
- Selected the correct interpreter
- Run your first Python script successfully
- (Optionally) Added notebook and auto-formatting support
Your VS Code is now ready for Python-based simulation and scientific computing.